


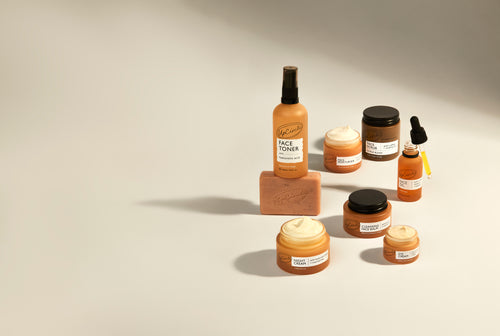


Build-your-own Plant Stand
As you might imagine, we get through a LOT of rolls of paper tape at UpCircle HQ. We hired Barbs as our warehouse manager a few months ago and soon noticed that she had begun collecting up the inner cardboard tubes from the rolls and taking a box full home each Friday.
When we asked why, she showed us the picture above and we were in awe!! Clearly, we had hired the right person, a true UpCircler! So, over to Barbs to share how she did it...
Confession: I’m a real plant fan - call me the Crazy Plant Lady. But having over 30 house plants in your home can take up a lot of space and whilst living in a botanical garden sounds like a dream, once you run out of shelves, window sills and bedside tables to put them on, you probably will have to invest in some sort of display pieces for them.
I’ve always wanted one of these stand-alone plants stands, but they can be quite expensive. So, I figured, why not build my own? Working in a warehouse comes with its perks, including an unlimited supply of the inner tubes of tape! With that and my stick-it-all glue gun I was ready to go! After vigorous testing of its sturdiness, I am ready to share the construction manual with you all. :D
The best thing about upcycling is that you can vary it any way you want. For this planter you can make multiple branches or levels, be as adventurous as you like!
You will need:
- 3 tape inner tubes (short)
- 3 wrapping paper / tin foil / cling film inner tubes (long)
- Glue gun (or other strong glue)
- A pen knife (or any sharp knife)
- An even, flat surface

Steps:
1. Stand your long tubes on an even, flat surface and measure out how high you want the “shelf” to be. Then measure the height of the short tubes onto this, and mark again. I recommend leaving about 5cm on the top of the tubes for added security for your plants.

2. The next measure you will need is the depth to cut into them. The purpose of the first cut is to create space for the small tubes so they are held up rather than just being glued on. You don’t want to cut too deep, however, to avoid weakening the long tube. About ¼ of the radius should be enough. (see photos) Mark this on the tubes as well – now you should have a rectangle on each which outlines the piece to cut out.

3. Using a sharp knife, very carefully cut into the long tubes. Depending on the thickness of the tube you may need to carve it multiple times before you get through, be patient and be careful!
4. Once all 3 are cut out, you are ready to assemble! Place the small tubes in the cuts you just made and secure them by using the glue gun. Runit around all 4 sides and fill any gaps.
Now hold the 3 pieces together and place them in their final position (if using 3 legs this will be a triangle) and glue them together in the middle. I found it helpful to make a mark on the top in line with there they need to be glued together.

5. Your stand is ready to hold your most precious plants! As the last – completely optional – step, jazz it up with any decoration you wish. I opted for a rather time consuming but very worth it option of wrapping a twine around it, but you can just paint it (careful though, don’t use watery paint, it’s paper!) or wrap paper around it, or even add some fairy lights!
