


CAN CRAFTS!
If you made the Vegan Chilli recipe that we posted last week, then you will have been left with a good few empty cans. Sure, you can just recycle them, but why not give them a whole new life in a different form? It's the UpCircle way after all!!
First things first, here is how to prepare them from your crafty activities:
Step 1: cut the top off completely using a can opener.
Step 2: wash thoroughly and leave soaking in water for 5-10 mins until the label lifts off. You should be able to easily peel it away from the can. Pop the label in your recycling bin.

Step 3: if the edges are left sharp, use pliers (or a blunt tool like a butter knife designated for crafts) and carefully press them down.
Now that you have a clean empty can, it’s your blank canvas, you can decorate it as you like and use this as-is for a number of things, such as:
- A pen holder for your new home-office
- A vase for some flowers on your desk
- As an outer planter
And the list goes on... If, however, you want to up your DIY game, read on.
DIY Herb Pot
This is a very simple yet satisfying project that you can get done on your lunch break.
Things you will need:
- A clean can (keep the top)
- A couple of cutting boards (or rolling boards)
- A nail or screw
- A hammer or alternative (see in Steps)
- Clay pebbles (or stones)
- Potting soil
- Plant seeds
- A sunny spot 😊
Steps:
1. Grab your cutting boards and put them side by side leaving about 1.5-2 cm in between. We will use these to hold the can top away from the surface to help you poke wholes in it. You can also place a tea towel under them to stop them from slipping.
2. Using the nail and the hammer, carefully poke holes into the can top. These will be the draining wholes in your pot; the size of the nail doesn’t matter so much, just make sure there is an even spread of the holes.
If you don’t have a hammer at hand, have a look around in your kitchen for alternative objects. I opted for the handle of my mortar (it’s made of stone) and used the flat end of it. Just be careful, safety first!

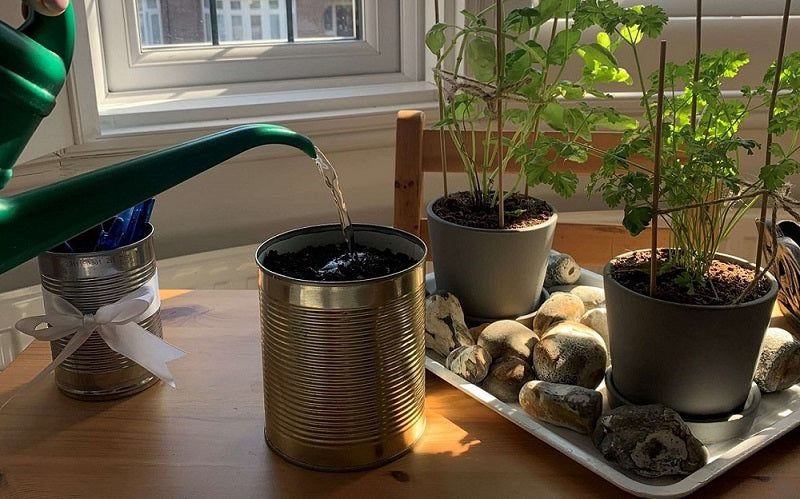
3. Once you’re done, you can put all your tools away, and bring out the pebbles, soil and seeds, and get ready to assemble!

Place an even layer of pebbles on the bottom, cover it with the can top you’ve just prepared, and spoon over a good amount of potting soil until it’s about 2 fingers from the top.

Gently press it down, then sprinkle yours seeds over the surface. Now cover it with another layer of soil (about 1 cm) and it’s all done.
Please note depending on your choice of herb seeds these instructions may change slightly, but this generally works with most seeds.

4. Finally, place your brand-new herb pot in a sunny spot, give it a bit of water and watch it grow (not literally though, it may take a week or two before it sprouts.)
